Inspired by the glamour of Goodwood Revival, discover how to create your own 1950s-inspired look. From vintage dressmaking and hand embroidery to beautiful accessories and creative upcycling, here’s how to bring La Dolce Vita glamour. (Cover photo by Richard Egan)
Ciao! Let’s step back to the 1950s. There is something utterly magical about 50s fashion. The elegant silhouettes, beautifully tailored dresses and glamorous accessories that never seem to go out of style. With Goodwood now preparing to bring its distinctive motoring culture to America through the launch of the Goodwood Road Racing Club of America, it feels like an exciting time to celebrate the international appeal of vintage style and to make your own look.
For this project, I wanted to capture the spirit of La Dolce Vita – think Christian Dior, Sophia Loren, beautiful Italian summers and the timeless glamour of the 1950s. Whether you’re dressing for Goodwood Revival in the English countryside, attending a classic car gathering in America or you simply love the elegance of 50s fashion, here’s how to make a retro-inspired look from top to toe.
Step 1: Find your inspiration and create a mood board
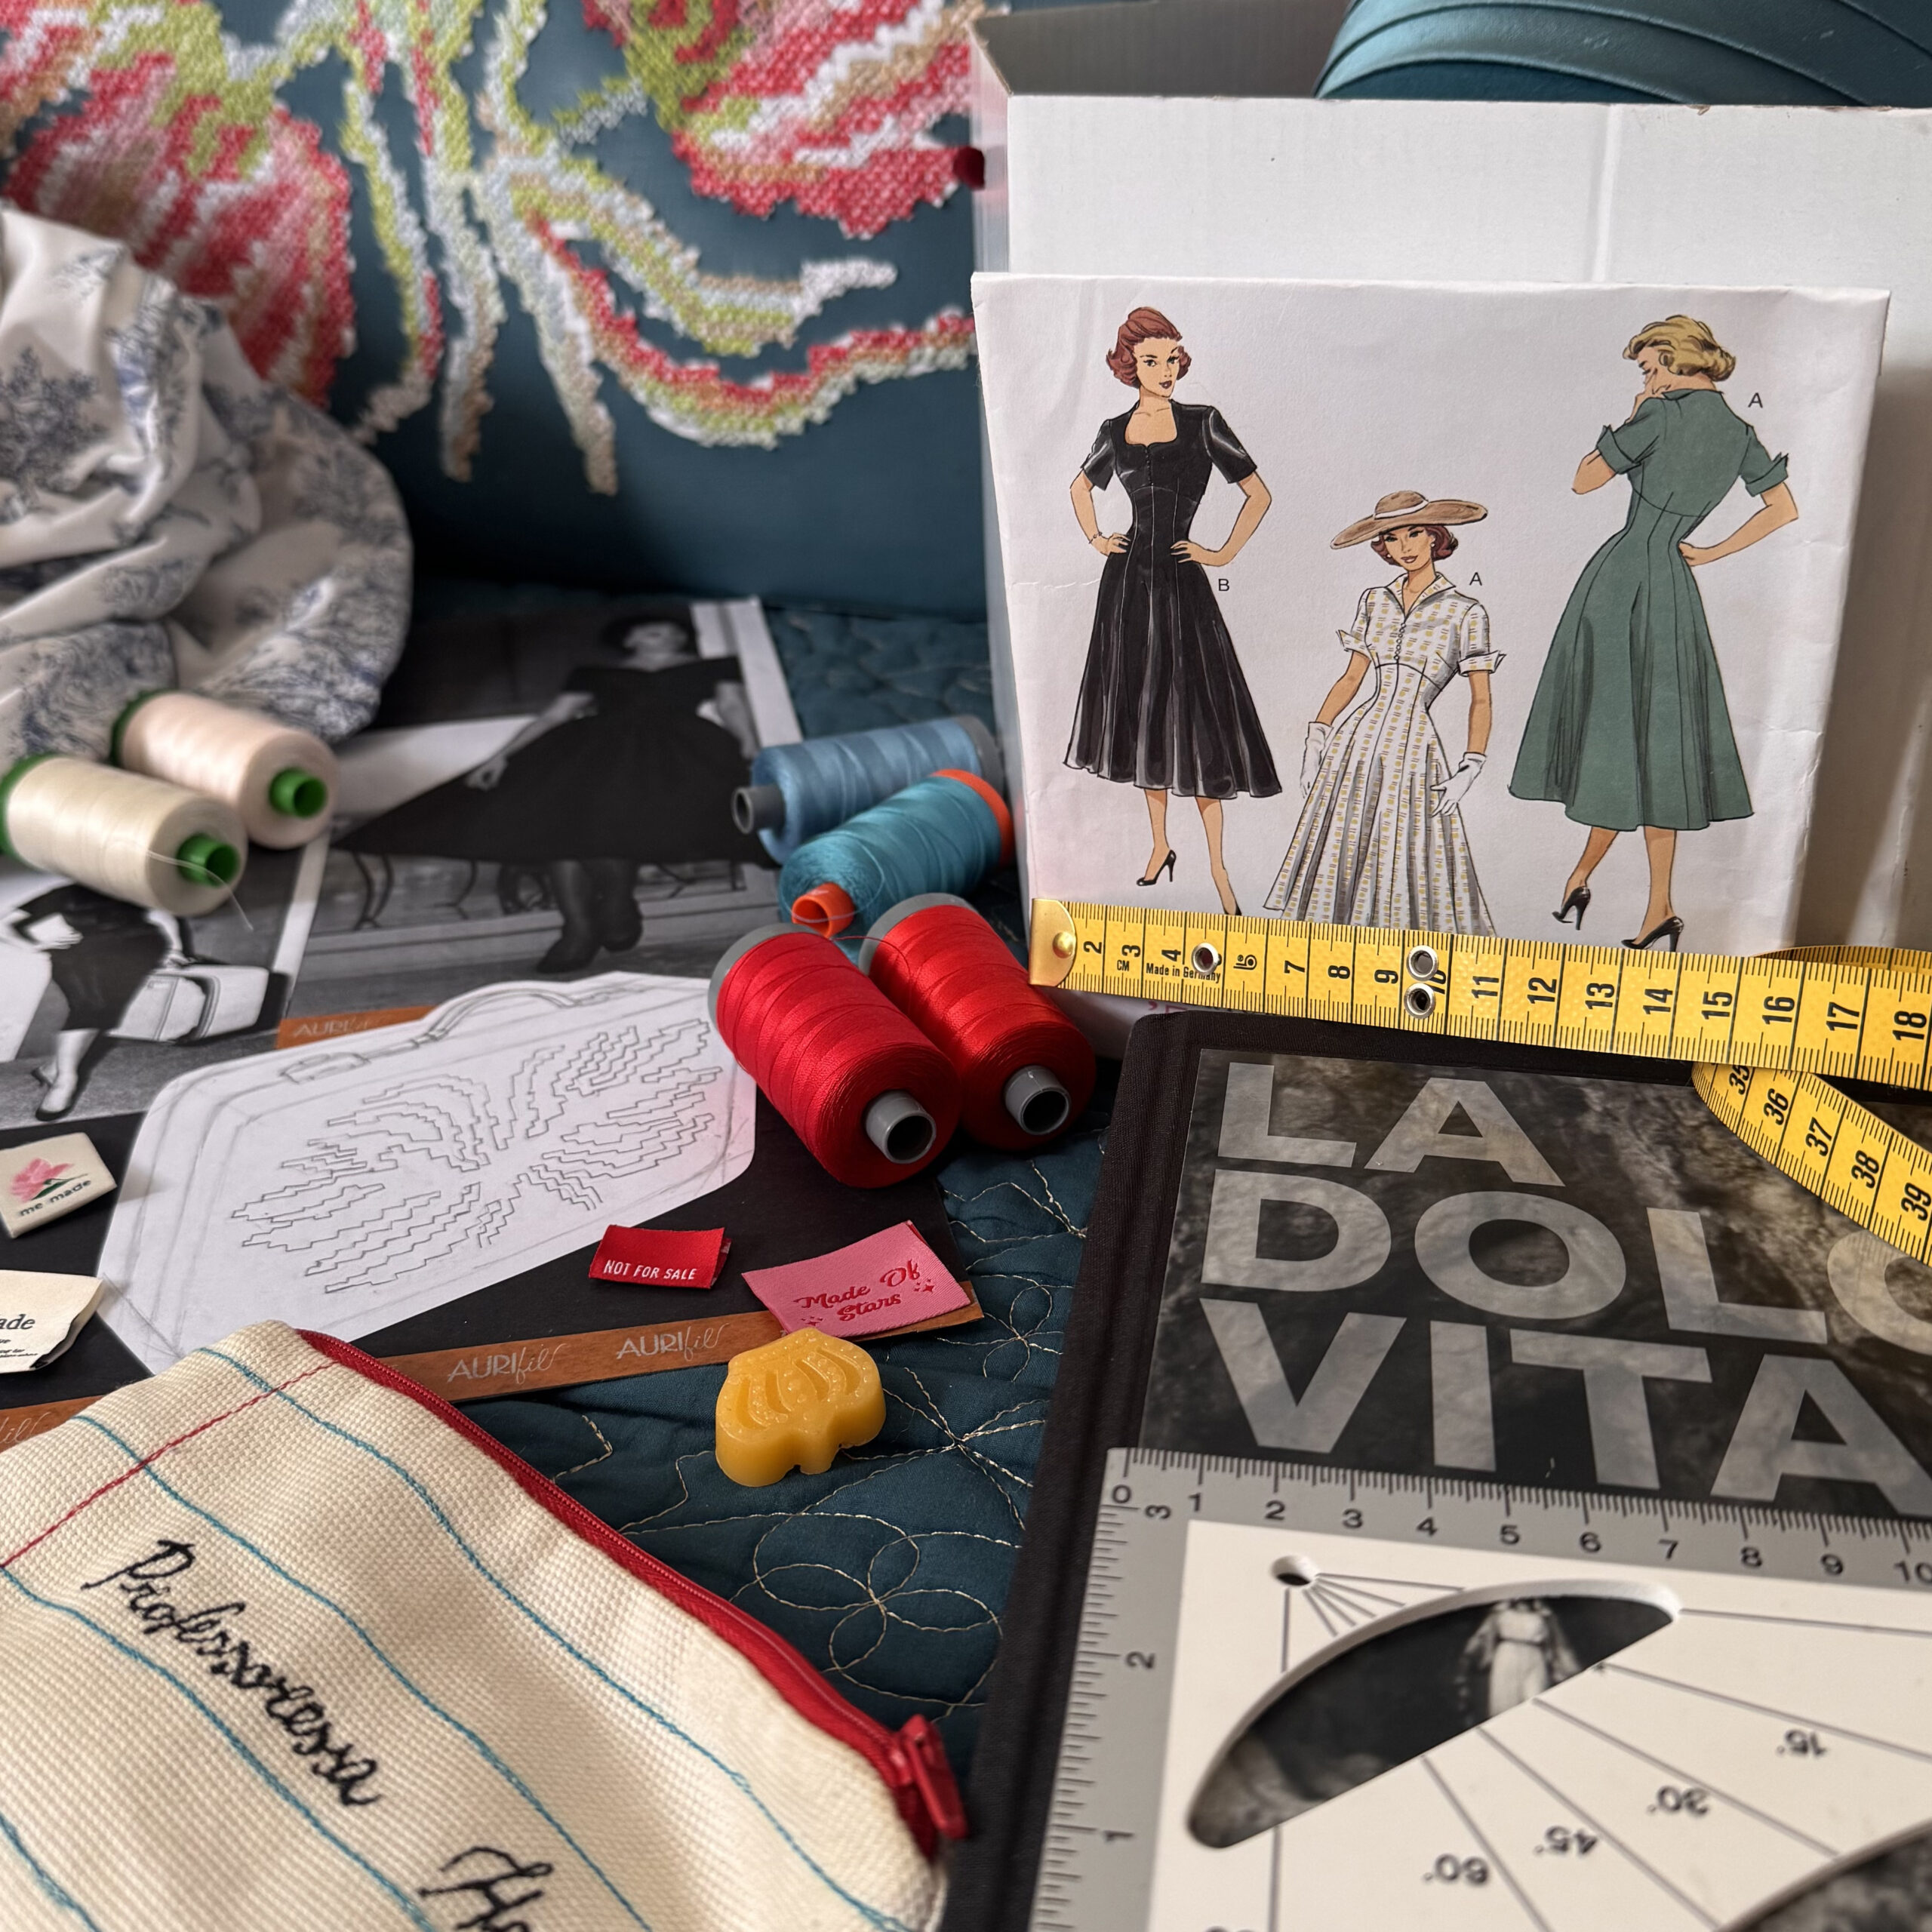
Before choosing a dress pattern or buying fabric, I like to spend time researching; looking at fashion magazines, vintage illustrations, and designers. For my 1950s-inspired outfit, I was particularly drawn to:
- Christian Dior: His iconic New Look silhouette, with its beautifully defined waist, full skirts and feminine proportions.
- Sophia Loren: Her effortless Italian glamour and elegant look.
- La Dolce Vita: The colours, romance and relaxed sophistication of 1950s Italian style.
- Wedgwood china: Its classic blue-and-white colour combinations, which inspired my fabric choice.
Collect photographs, fabric samples, colour palettes, vintage patterns and little details that capture the look you want to achieve. Pinterest is also a wonderful place to start, and don’t forget museums!
My tip: Don’t feel you have to recreate a historical outfit exactly. Use vintage fashion as your starting point and introduce details that reflect your own personality.
Step 2: How to choose a 1950s dress pattern
Once I had my inspiration, it was time to find a pattern to match my ideas. I chose Butterick B6018 from Sew Direct. When choosing a vintage-inspired sewing pattern, look for these characteristic features:
- A fitted bodice that defines the waist.
- A full or gently flared skirt.
- A beautifully shaped neckline.
- Short sleeves or elegant three-quarter-length sleeves.
- Cuffs, collars and decorative buttons for added detail.
Take your measurements carefully before cutting your fabric, and always check the finished garment measurements on the pattern envelope.
My tip: Make a toile (a test version of your garment) if you’re unsure about the fit. It gives you an opportunity to adjust the bodice, waist and sleeves before cutting into your beautiful fabric.
Step 3: Select a fabric that captures vintage elegance
Fabric choice can completely change the character of a dress. For my Goodwood Revival outfit, I chose a beautiful blue-and-white cotton fabric inspired by Christian Dior’s collections and the timeless elegance of Wedgwood china. I wanted something that felt fresh, feminine and sophisticated, while still having a lovely vintage character. Some lovely options include:
- Cotton poplin for a crisp, structured finish.
- Cotton sateen for a subtle sheen and elegant drape.
- Lightweight cotton for a softer, everyday look.
I also recommend buying a little extra fabric if you plan to make matching decorative details. I used extra for covered buttons and a belt.
Step 4: Choose the right thread for a professional finish
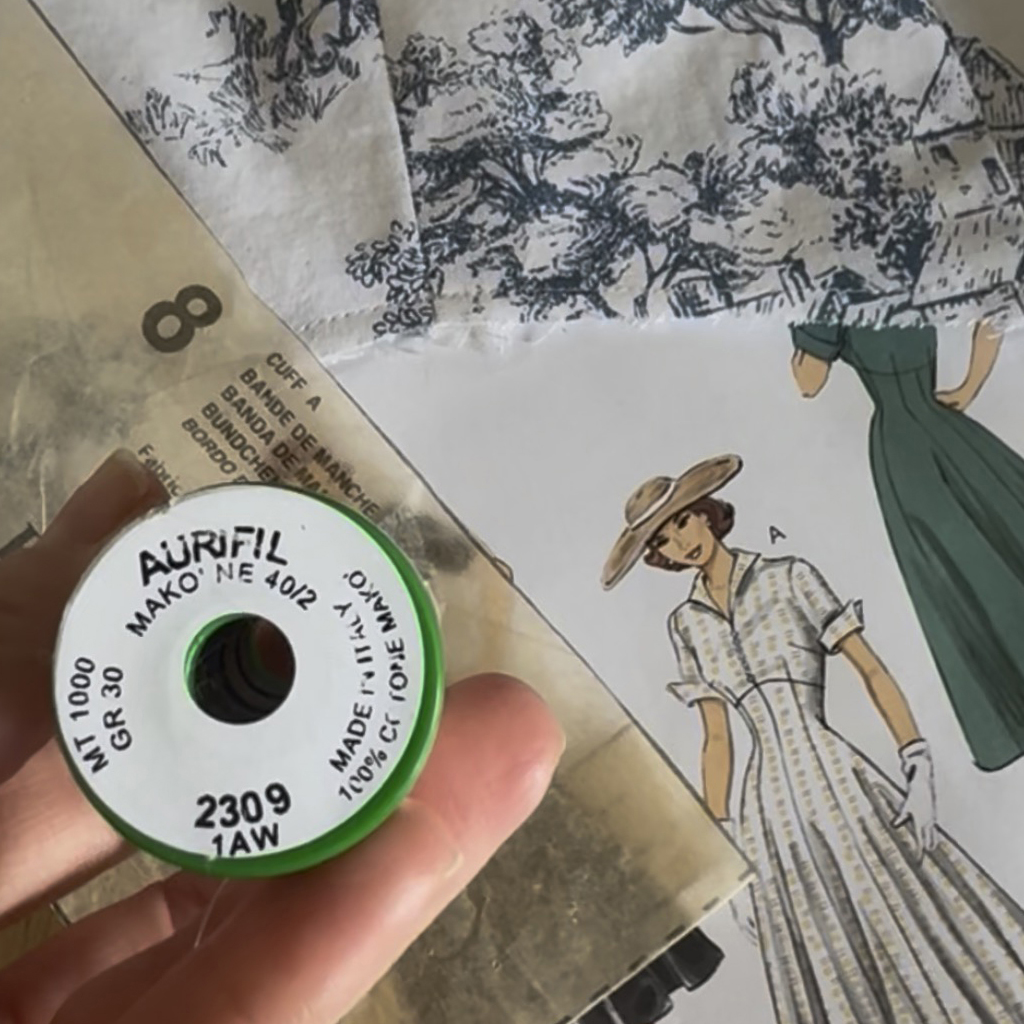
Thread is often an overlooked element, but choosing the right thread makes a real difference to the quality and appearance of a finished garment. For my dress, I used several Aurifil threads for different stages of construction.
For the main seams: Aurifil no.2309 Silver White Mako’ne 100% Cotton
I chose this thread because its colour matched my fabric beautifully. Look closely at the cuffs in my photographs and you’ll see just how important a good colour match can be.
For the overlocker: Aurifil Forty3 no.2021 White
It combines the versatility and lustrous appearance associated with 40wt thread with additional strength, making it a useful choice for garment construction.
My dressmaking tip: Always test your thread on a fabric offcut before sewing your garment. Check the stitch tension, seam appearance and colour in natural daylight.
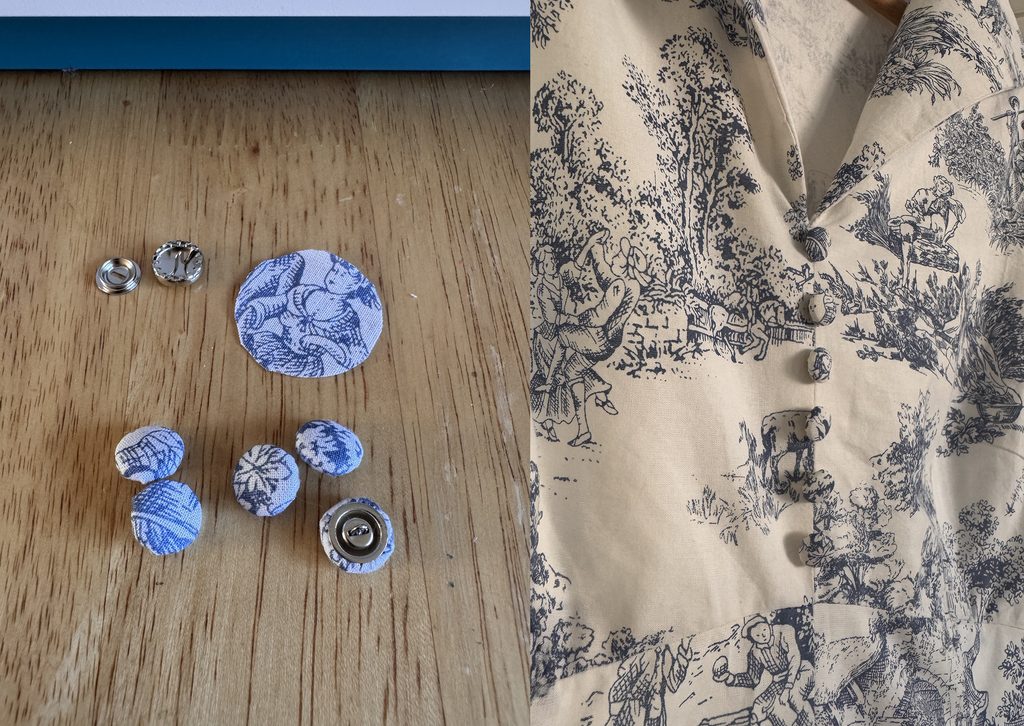
Step 5: Finishing details with handmade buttons
Buttons are such a lovely opportunity to personalise a handmade garment. I decided to make my own buttons so they would match the fabric. They create a coordinated, professional-looking finish. Other beautiful details to consider include:
- Decorative cuffs.
- Contrast piping.
- Peter Pan collars.
- Delicate embroidery.
- Hand-finished hems.
Step 6: Complete your 50s look with the perfect hat
Now for one of my favourite finishing touches: the hat! A beautiful hat can completely transform a vintage-inspired outfit. It adds elegance and personality, helpings to create a cohesive look. For Goodwood Revival, I chose a hat by Modista Style, which I love for its exceptional attention to detail and quality materials. It adds just the right amount of vintage glamour. When choosing a hat for a 1950s-inspired outfit, consider:
- The shape and proportions of your dress.
- The colours in your fabric.
- The overall silhouette you want to create.
- Whether you want a subtle finishing touch or a statement accessory.
You could also add gloves, a structured handbag, a delicate necklace or vintage-inspired shoes.
Step 7: Create an embroidered vintage suitcase
I wanted to create something to complement my Goodwood Revival outfit and to create the sense of adventure embodied in La Dolce Vita. I decided to give an vintage suitcase a new identity using cross-stitch embroidery.
My inspiration began with researching the botanical designs of William Morris and the fashion work of Givenchy. I started by sketching a tulip motif, experimenting with the shape of the petals and leaves until I was happy with the composition. Once I had my design, I transferred it onto graph paper to create a cross-stitch template. This is a really useful technique when creating a cross-stitch pattern because each square on the graph paper represents one stitch. It also makes it much easier to plan your colours and calculate how much thread you will need.
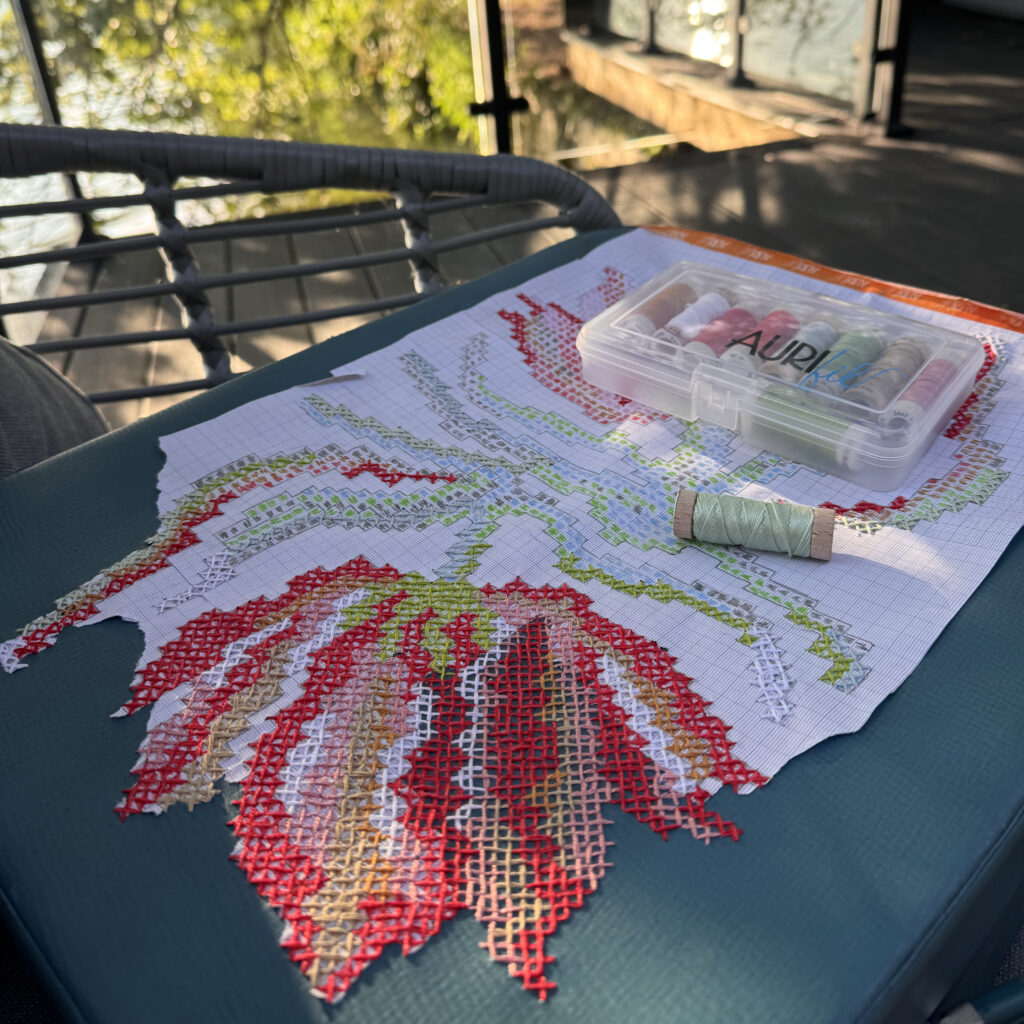
Choose your embroidery threads
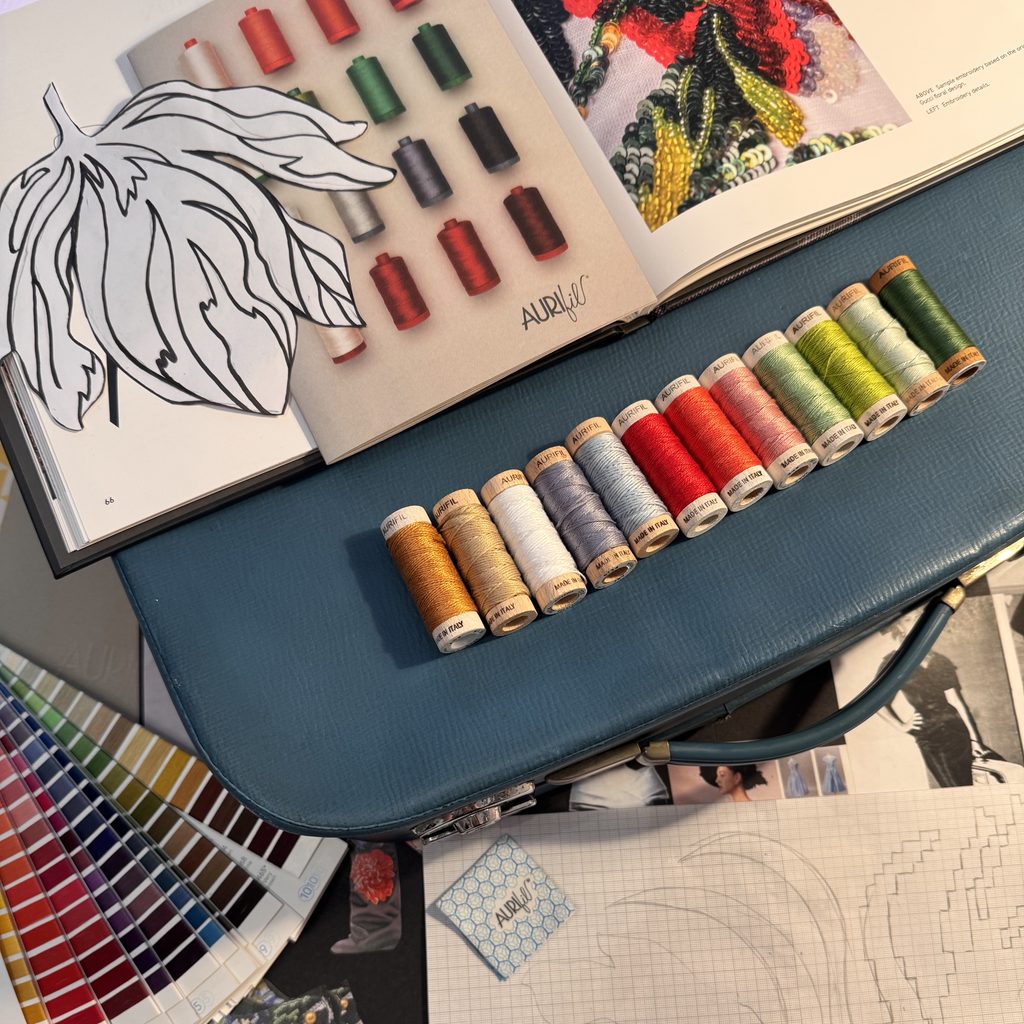
I became particularly fond of Aurifil Cotton Floss and 8WT Mako. I love the thickness and versatility of these threads. They create bold, tactile stitches with beautiful texture, allowing the embroidered flowers to become part of the suitcase’s surface. Here are the colours I used:
For the tulip petals:
- Aurifil 8WT Mako 2250 – Red.
- Aurifil 8WT Mako 5002 – Medium Red.
- Aurifil Cotton Floss 2445 – Victorian Rose.
- Aurifil 8WT Mako 2024 – White.
For the leaves and stems:
- Aurifil 8WT Mako 1231 – Spring Green.
- Aurifil Cotton Floss 2930 – Golden Toast.
- Aurifil 8WT Mako 2912 – Platinum.
- Aurifil 8WT Mako 2846 – Bright Grey Blue.
- Aurifil 8WT Mako 2326 – Linen.
Bring your cross-stitch design to life
With the pattern and colours ready, it was time to stitch! It almost feels like drawing with thread. One stitch at a time, the design gradually develops, and the colours begin to bring the flowers to life. When working on a larger embroidery project, I recommend:
- Organising your threads by colour before starting.
- Following your graph-paper pattern carefully.
- Checking the colour placement regularly.
- Keeping your stitches consistent.
- Taking time to appreciate how the design develops.
Don’t rush. Embroidery is all about enjoying the process as much as the finished result. The combination of the different Aurifil thread weights gave the tulips a lovely dimensional quality.
Here’s a little surprise: my embroidered suitcase wasn’t just decorative! I also wanted to make it functional, so I carefully cleaned and restored the original suitcase before transforming its interior into a beautiful picnic hamper. I relined the inside using gorgeous William Morris fabric and added pockets and compartments to hold everything needed for a stylish picnic. There was room for glasses, bottles of prosecco and all the little essentials for a summer outing. I love the idea of taking something forgotten and giving it a completely new purpose.
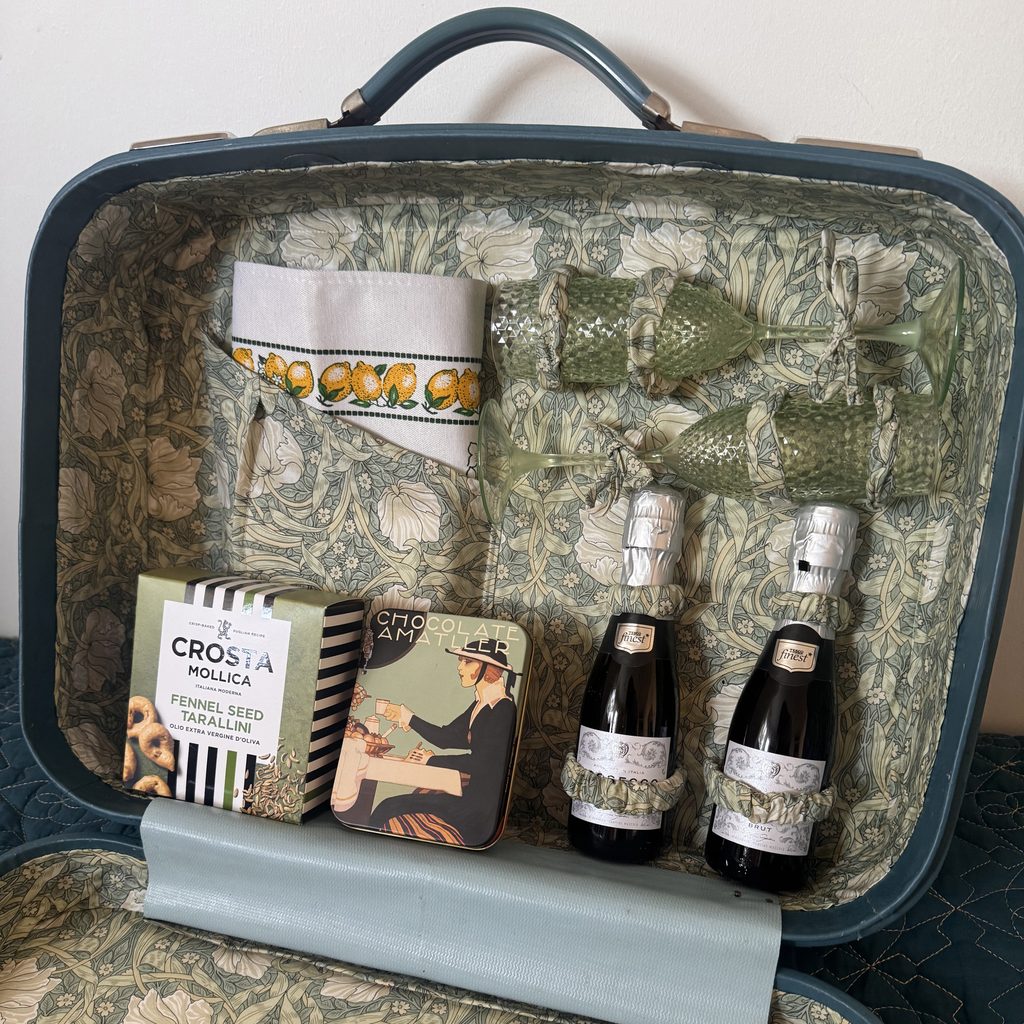
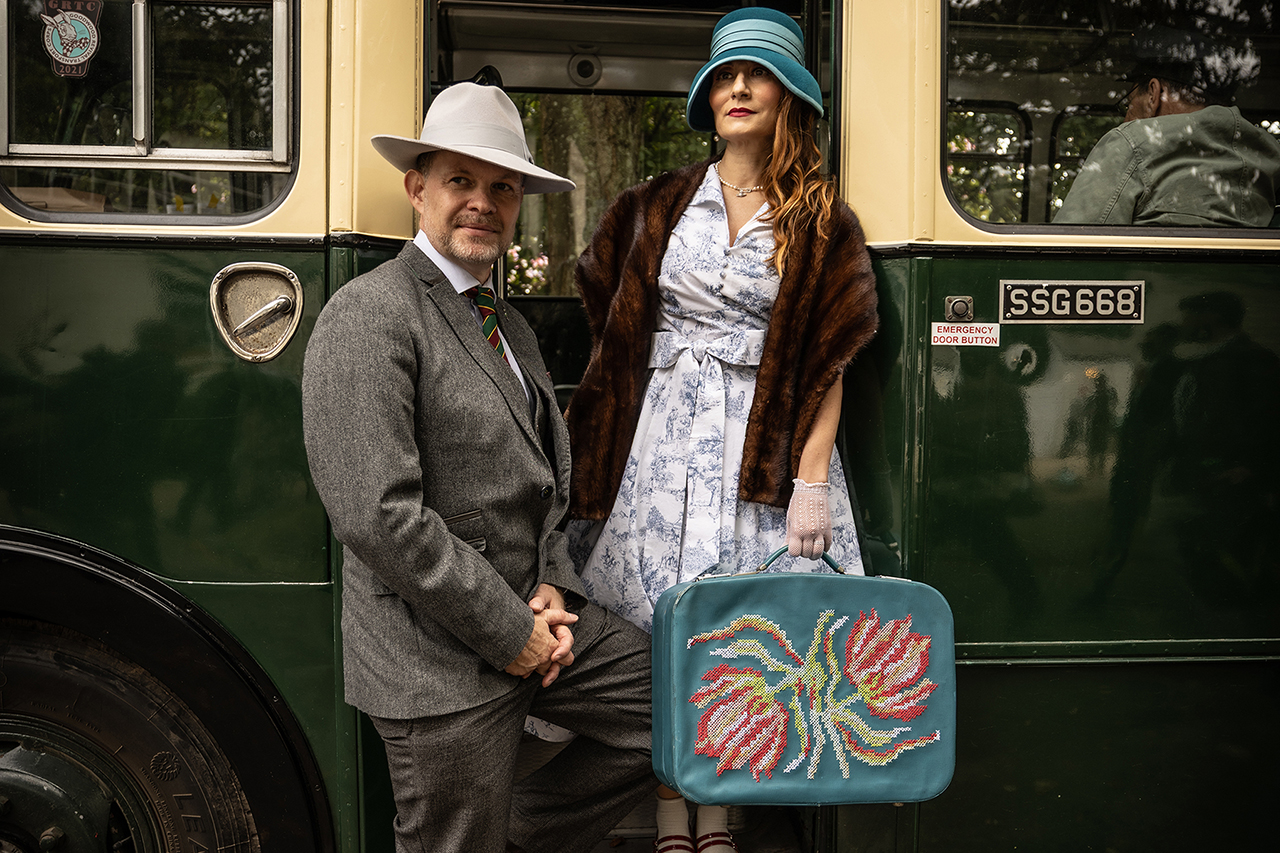
Here is the final look:
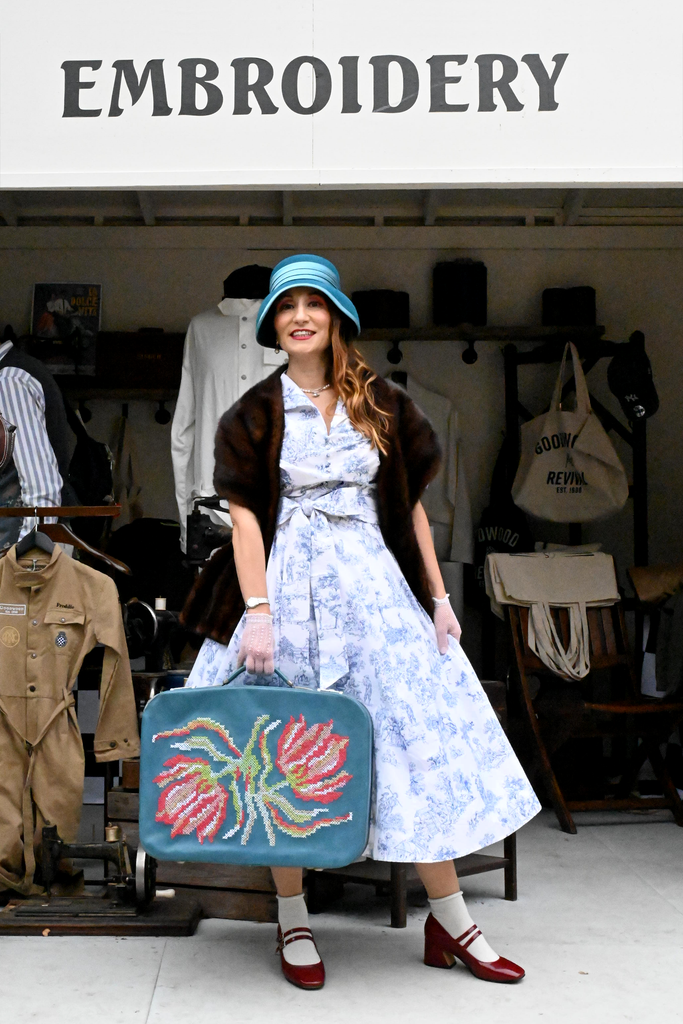
You can follow more of my creative adventures on Instagram @zestandlavender
If you have any questions about the dress, embroidery threads or suitcase project, I’d love to hear from you. Leave a comment and let’s chat!
Ciao for now!
#1950sFashion #1950sDress #GoodwoodRevival #VintageDressmaking #HandEmbroidery #CrossStitch #AurifilArtisan #WearableArt #ZestAndLavender #LaDolceVita